How to un-ACES Unreal
Unreal integrated the ACES’s Output Device Transform in 2015. It also uses an ACES color space for applying color grading parameters. Not much has changed since then, and it’s not clear at first sight how this can be modified.
Here I present two ways to change this default and implement your own picture formation process. First option requires no engine modification. It can be handy if you want to test things quickly, or if you are unable to change the engine. Second option is with engine modification. It is more involved but could lead to more control and consistency.
This guide was done on 5.3.2, but should be valid for most versions even before 5.0 (don’t quote me). Also note that this has been tested with the default sRGB working color space, and an sRGB output. You might encounter additional hurdles if you venture into HDR output or use a different working color space.
Option 1 – Post-Process Material
This option is great if you want to just try things without too much fuss. It is also easier to bring in data, say a LUT. Here’s the final result.
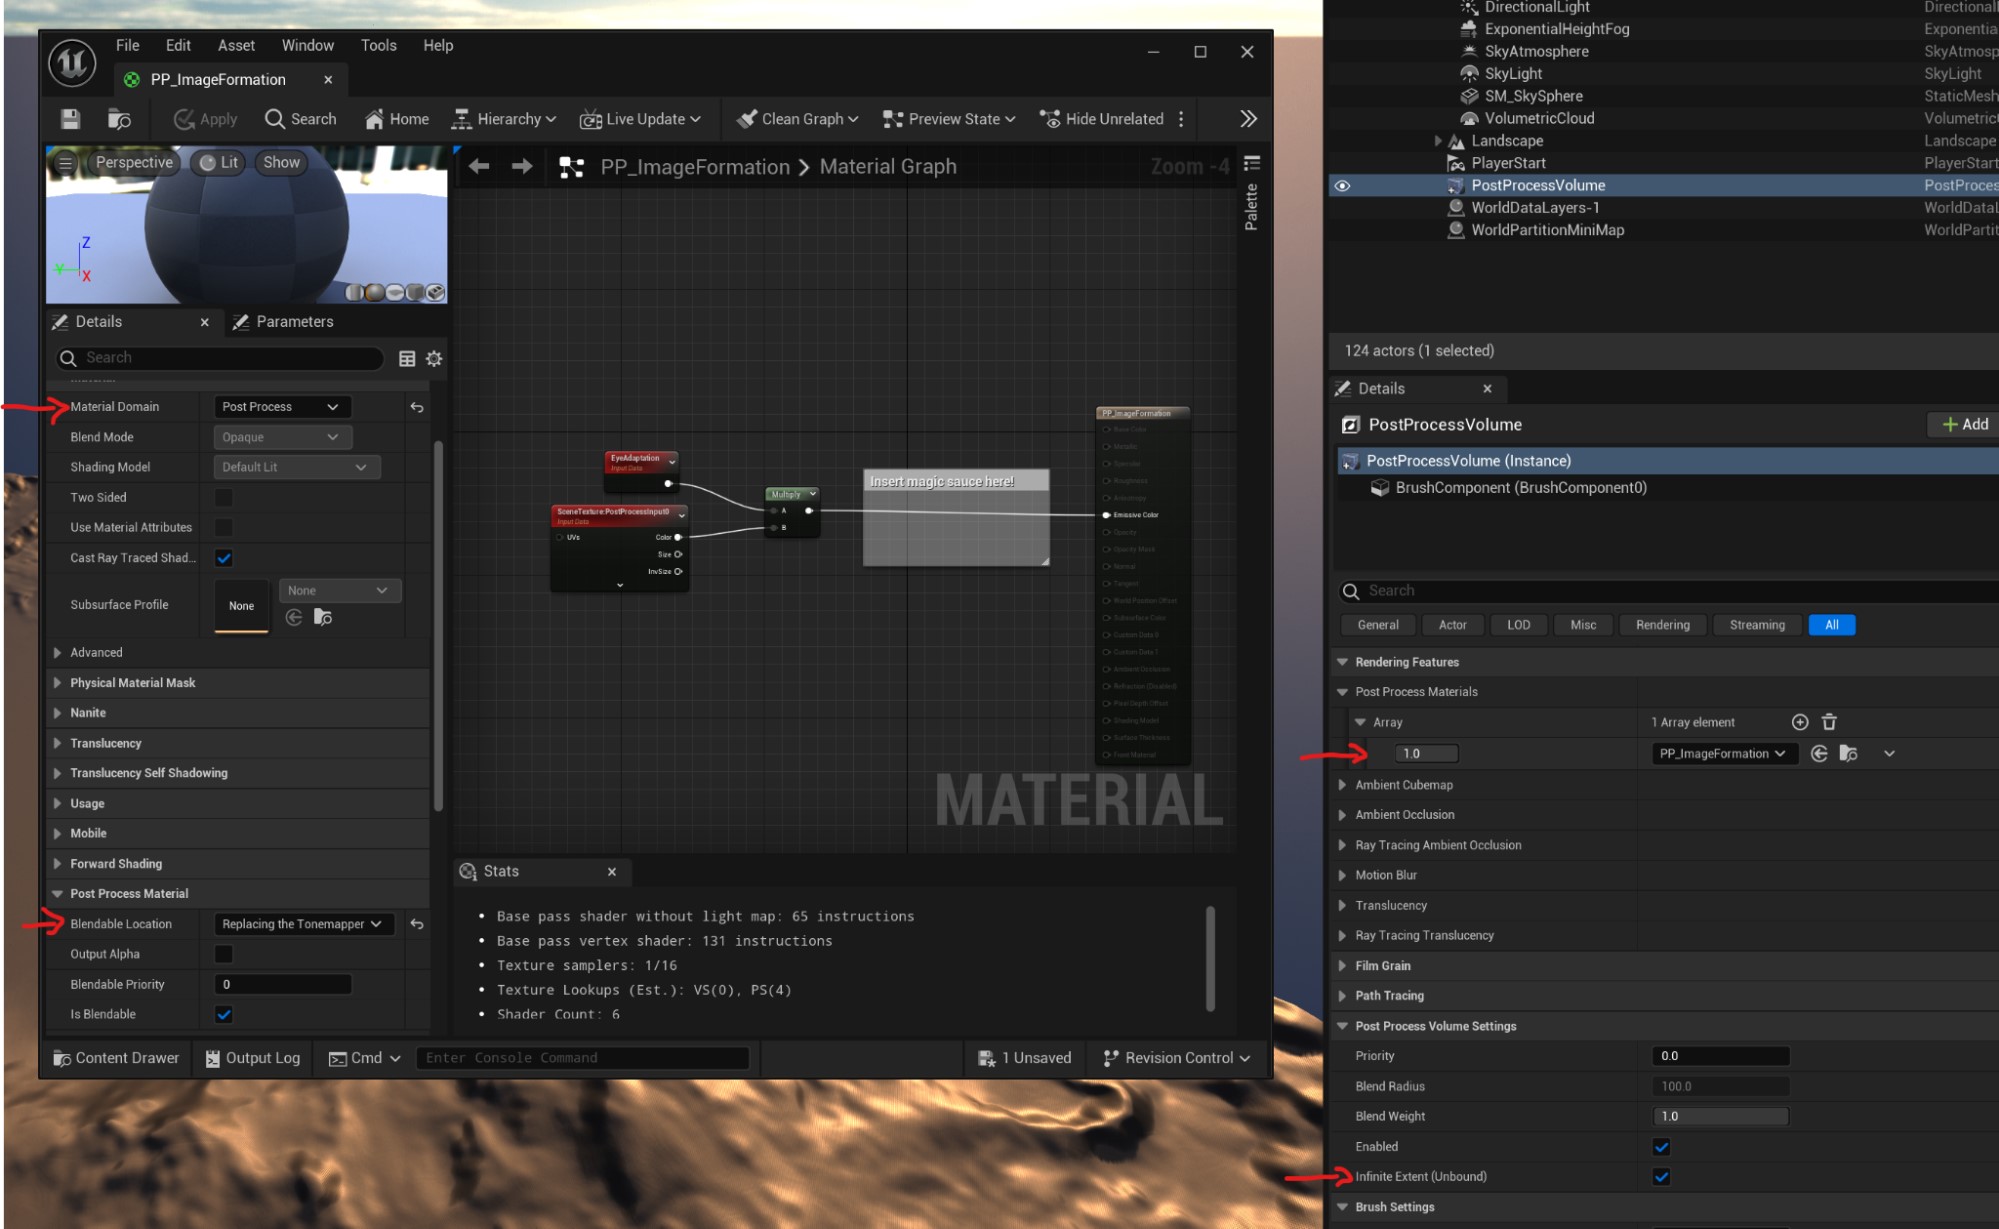
The final, glorious setup.
First, create a Post-Process Material, and set its blendable position to Replace Tonemapper.
Assign that post-process material to an unbounded Post-Process Volume in your map. You will need to repeat this setup for every map. This is one of the reasons I modified the engine - I didn’t want my team to accidentally forget or remove this setup.
In the post-process material, you can sample the rendered RGB buffer with a Scene Texture node set to PostProcessInput0. You can plug that straight into the “emissive color” and you are done (not really).
With this setup, none of your pixels will pass through ACES. Success! It also looks like pure garbage, but that’s on you to do something about it.
Some annoyances
Skipping the internal picture formation pipeline means you lose the internal color grading tools, film grain, etc.
You also lose exposure control, but luckily this is easy to restore. You will need to multiply the output of the Scene Texture node with the EyeAdaptation node.
You can then proceed to form a picture out of this. Note that your output will be used as-is on screen, so make sure you include the necessary encoding (i.e. transfer function).
Good luck!
Option 2 – Engine modification
If you prefer surgery, you can do so by modifying a single file :
Engine/Shaders/Private/PostProcessTonemap.usf
Unreal will combine all its internal color grading tools and the ACES image formation pipeline into a single internal 32x32x32 LUT, which is then applied in PostProcessTonemap.usf. This LUT is created in PostProcessCombineLUTs.usf, but you don’t really need to care about this file.
You can just modify PostProcessTonemap.usf at line 488 (where it calls ColorLookupTable()) and change this to whatever you want. If you skip that function call, you will skip reading the internal LUT, effectively skipping all of ACES ODT (and color grading). If you want to integrate reading an external LUT, this is going to be more involved, as you will need to expose the LUT texture in Unreal UI, and then pass it to the Tonemap shader. Doable, but a bit out of scope for this simple tutorial. This is actually easier to do with the first method, since you can use Unreal Material’s machinery.
As with the first method, OutDeviceColor should be fully formed, encoding included.
Note that LinearSceneColor is already scaled by the exposure just a few lines above.
Also note here that film grain is applied just before, and goes through AP1 for some reason. However it’s gated by #if USE_FILM_GRAIN, which I believe will be completely removed if you don’t set any film grain in your Post Process Volume. Or you can just strip that code yourself. You’re the surgeon!
Once you modified this file, hit ctrl+shift+. to recompile shaders that have changed. You might also want to set the console variable r.ShaderDevelopmentMode to 1 if you don’t want to crash the editor if you’ve made a typo. See : https://docs.unrealengine.com/5.3/en-US/shader-development-in-unreal-engine/
That’s it! Enjoy the picture formation rabbit hole.